Remaking a Broken Part in 3D with Claude and FreeCAD

A broken plastic part, impossible to find in stores, can now be remade and 3D-printed in a matter of minutes. Not after a long course in computer-aided design (CAD), but simply by describing the part to Claude, which generates the model. Here, step by step, is how we rebuilt a cylindrical fitting from a few photos and measurements taken with a caliper.
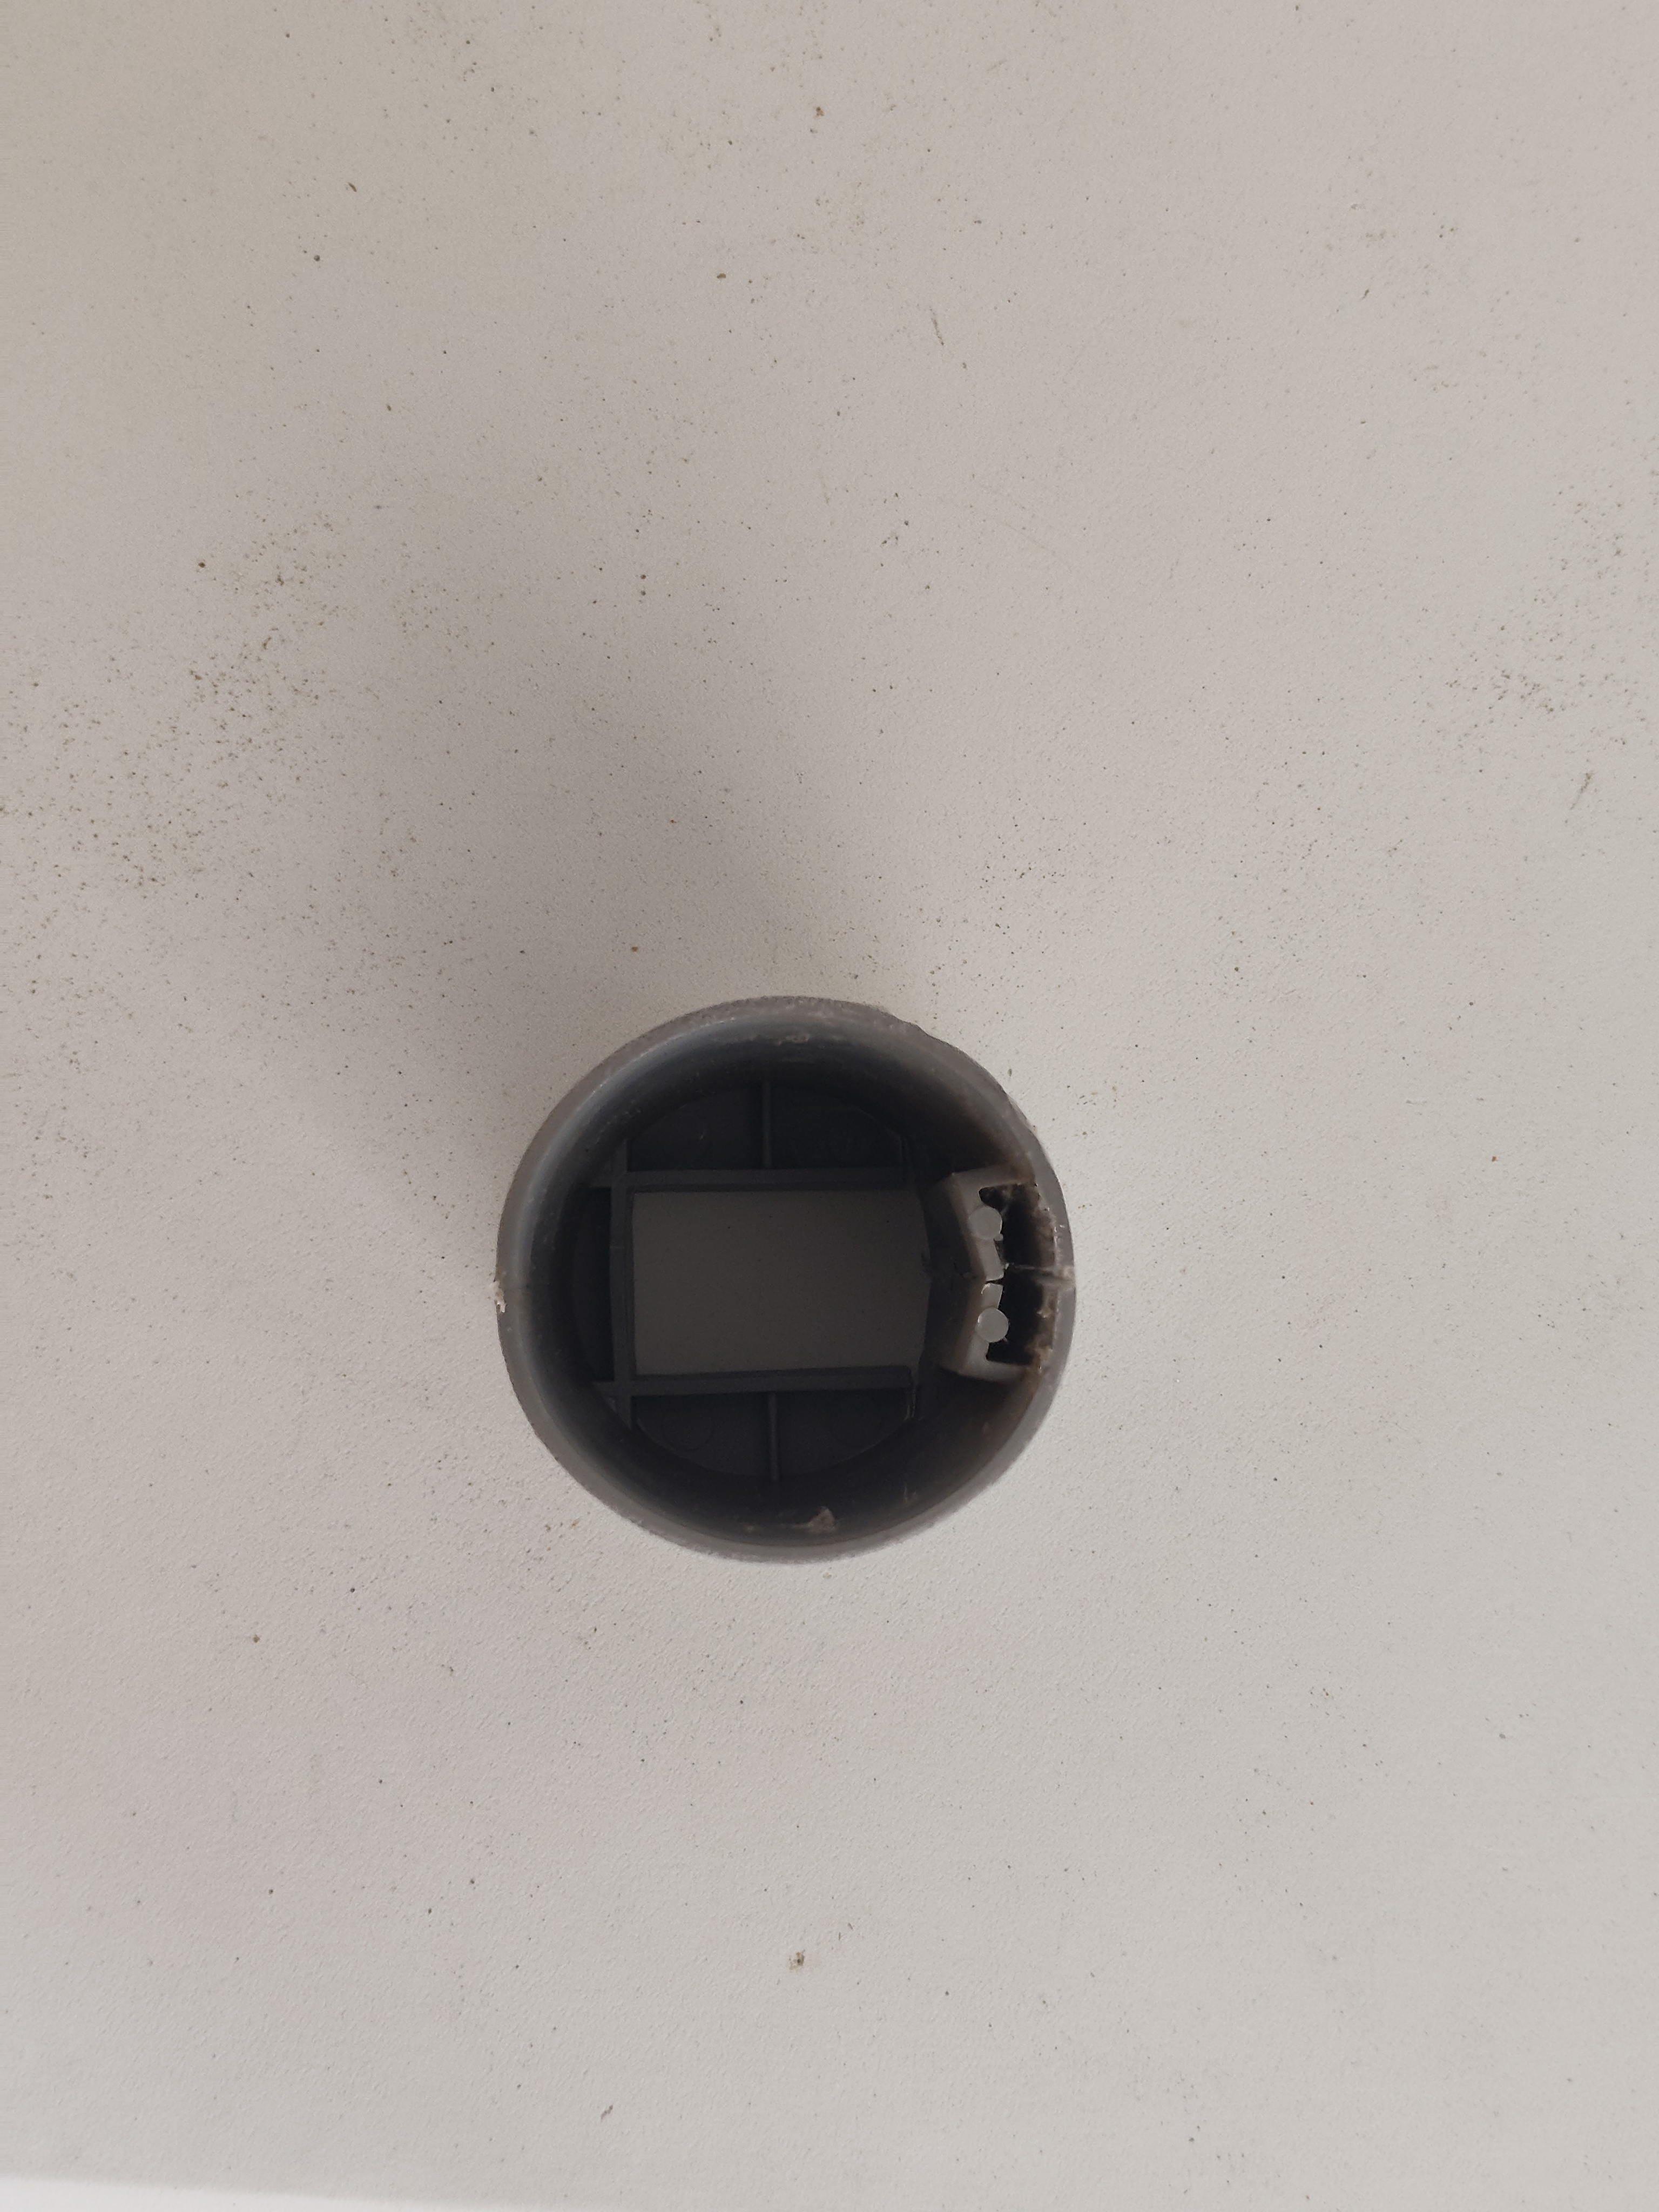
The starting point: a small broken part
It all starts with an ordinary object: a cylindrical plastic fitting, split in two. The kind of part you can't find anywhere, that has no reference number, and whose absence nonetheless jams an entire mechanism.
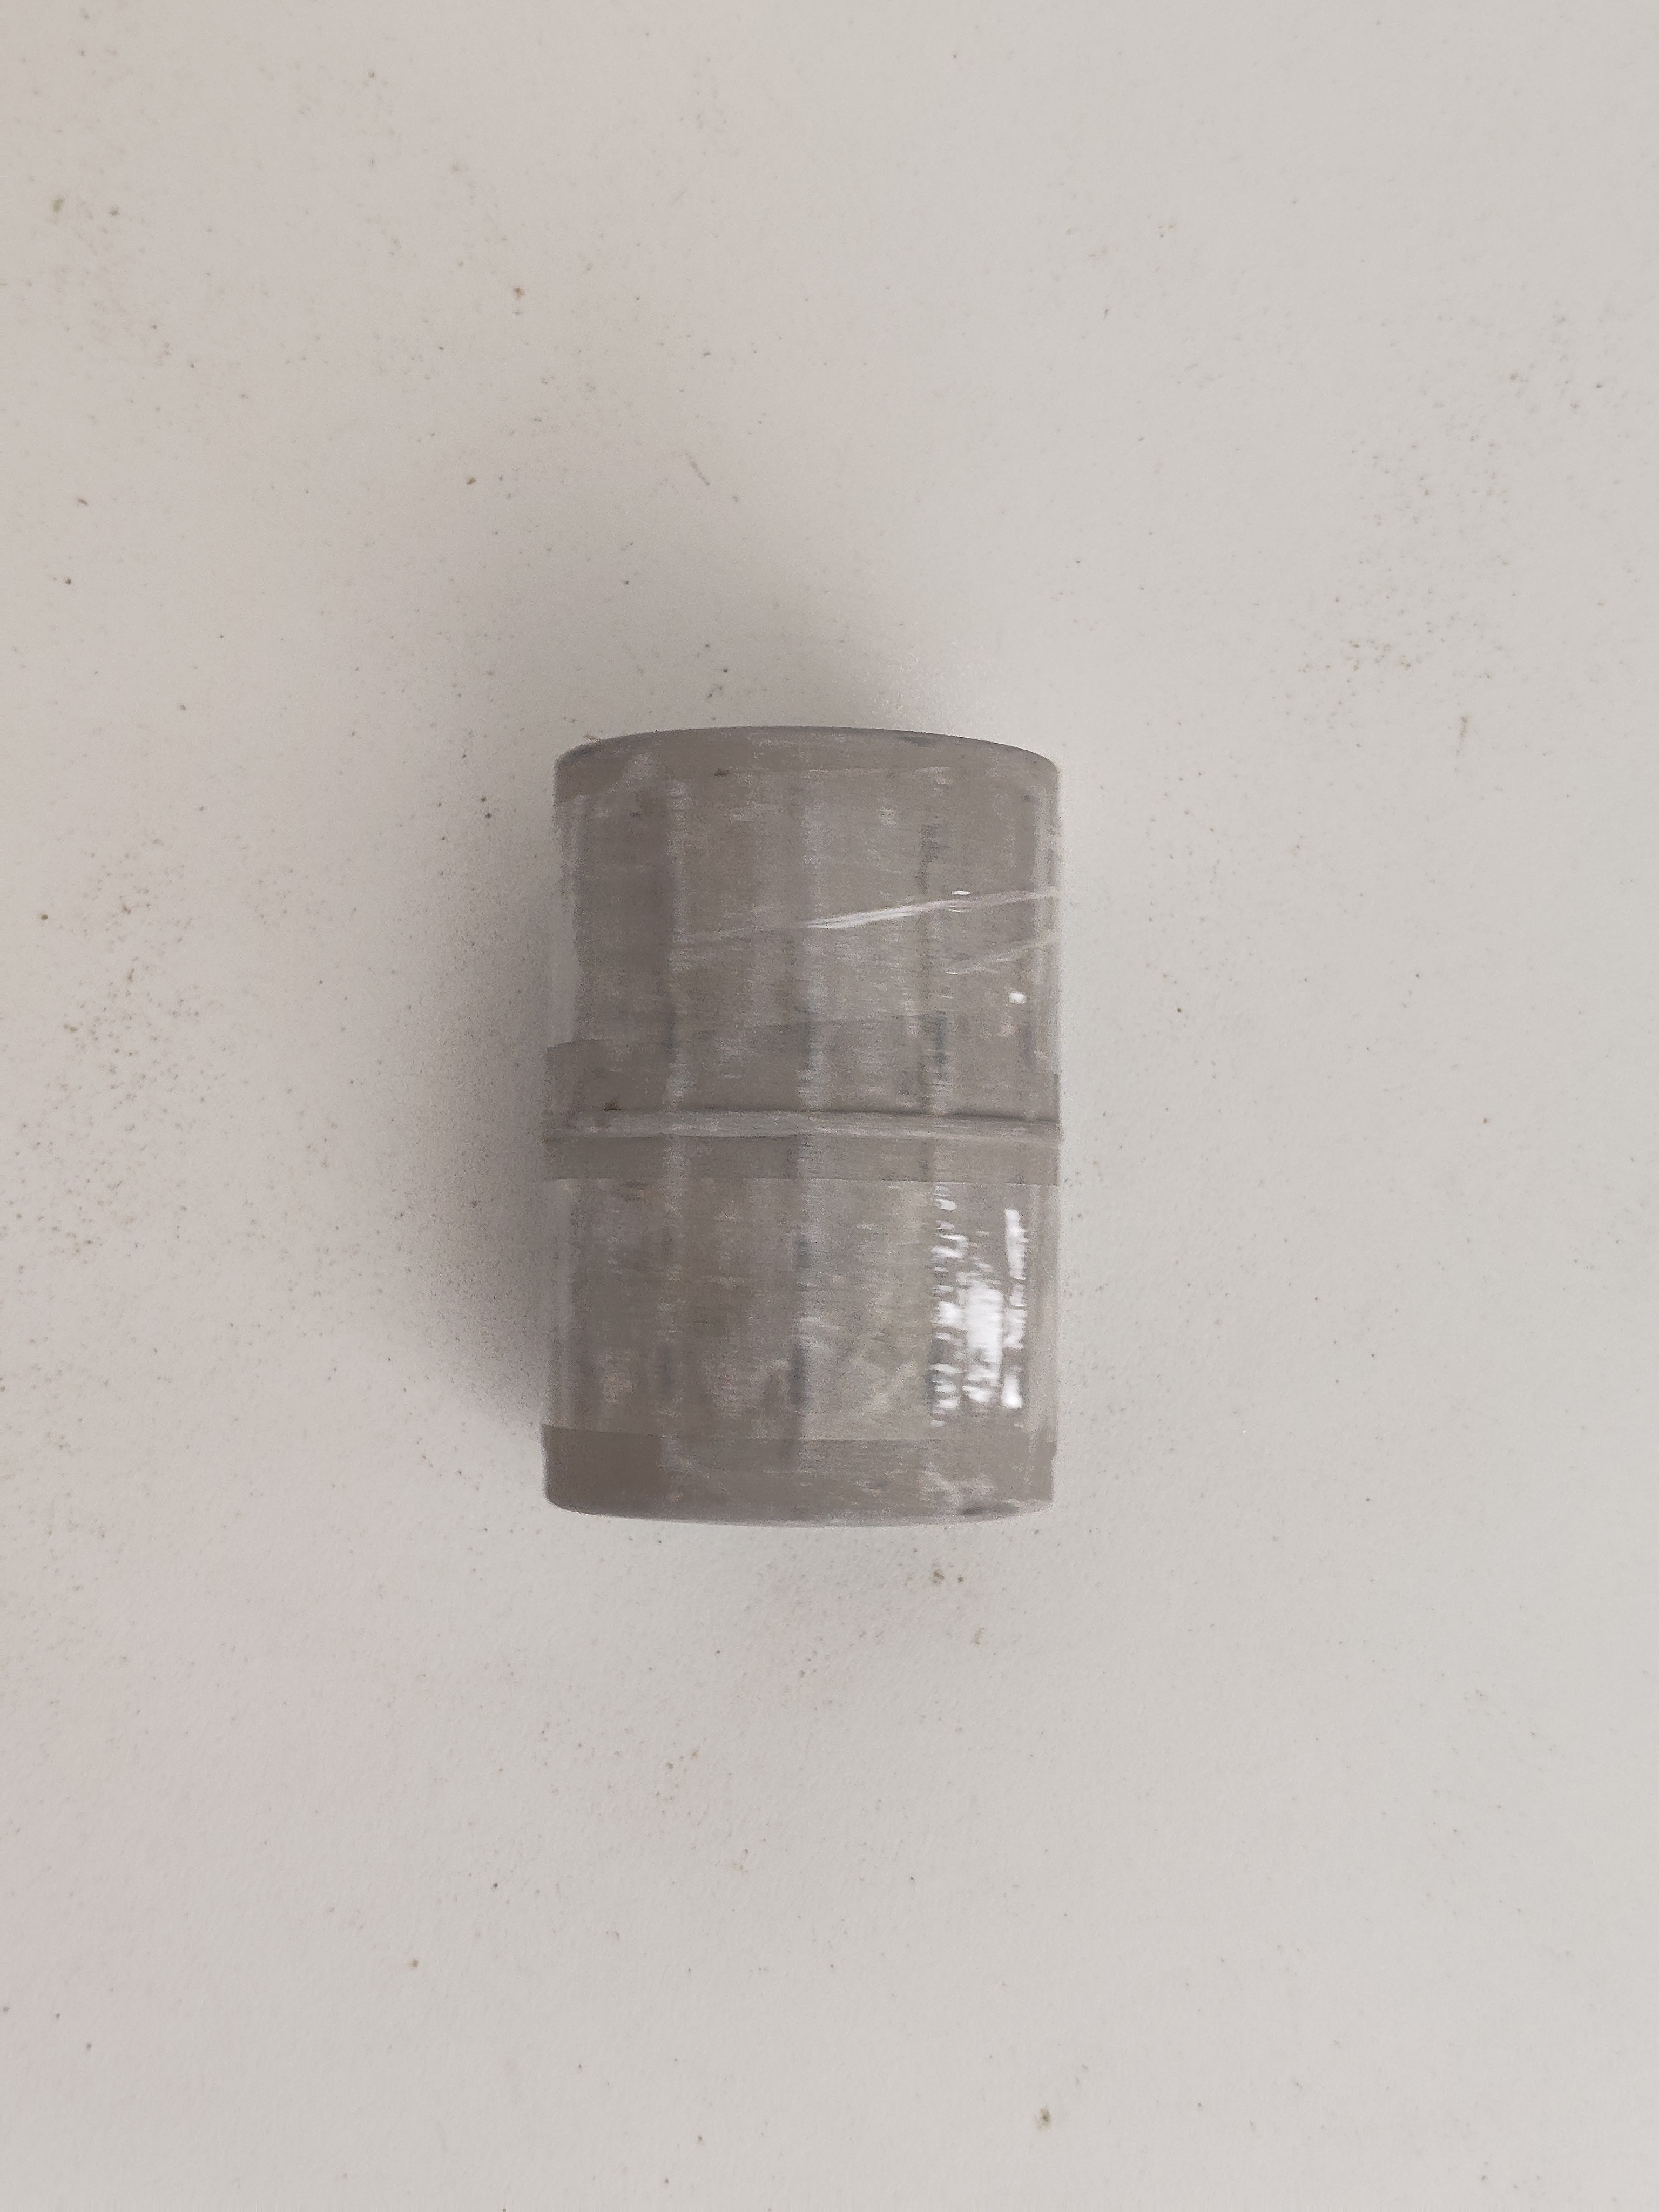
Rather than hunting for a replacement that doesn't exist, we chose to recreate it: measure it, model it, then 3D-print it. And for the modeling, instead of opening a CAD program and drawing everything by hand, we simply had a conversation with Claude.
Describe, rather than draw
The principle is simple. You take a few photos, measure the part with a caliper, and describe it to Claude in plain language:
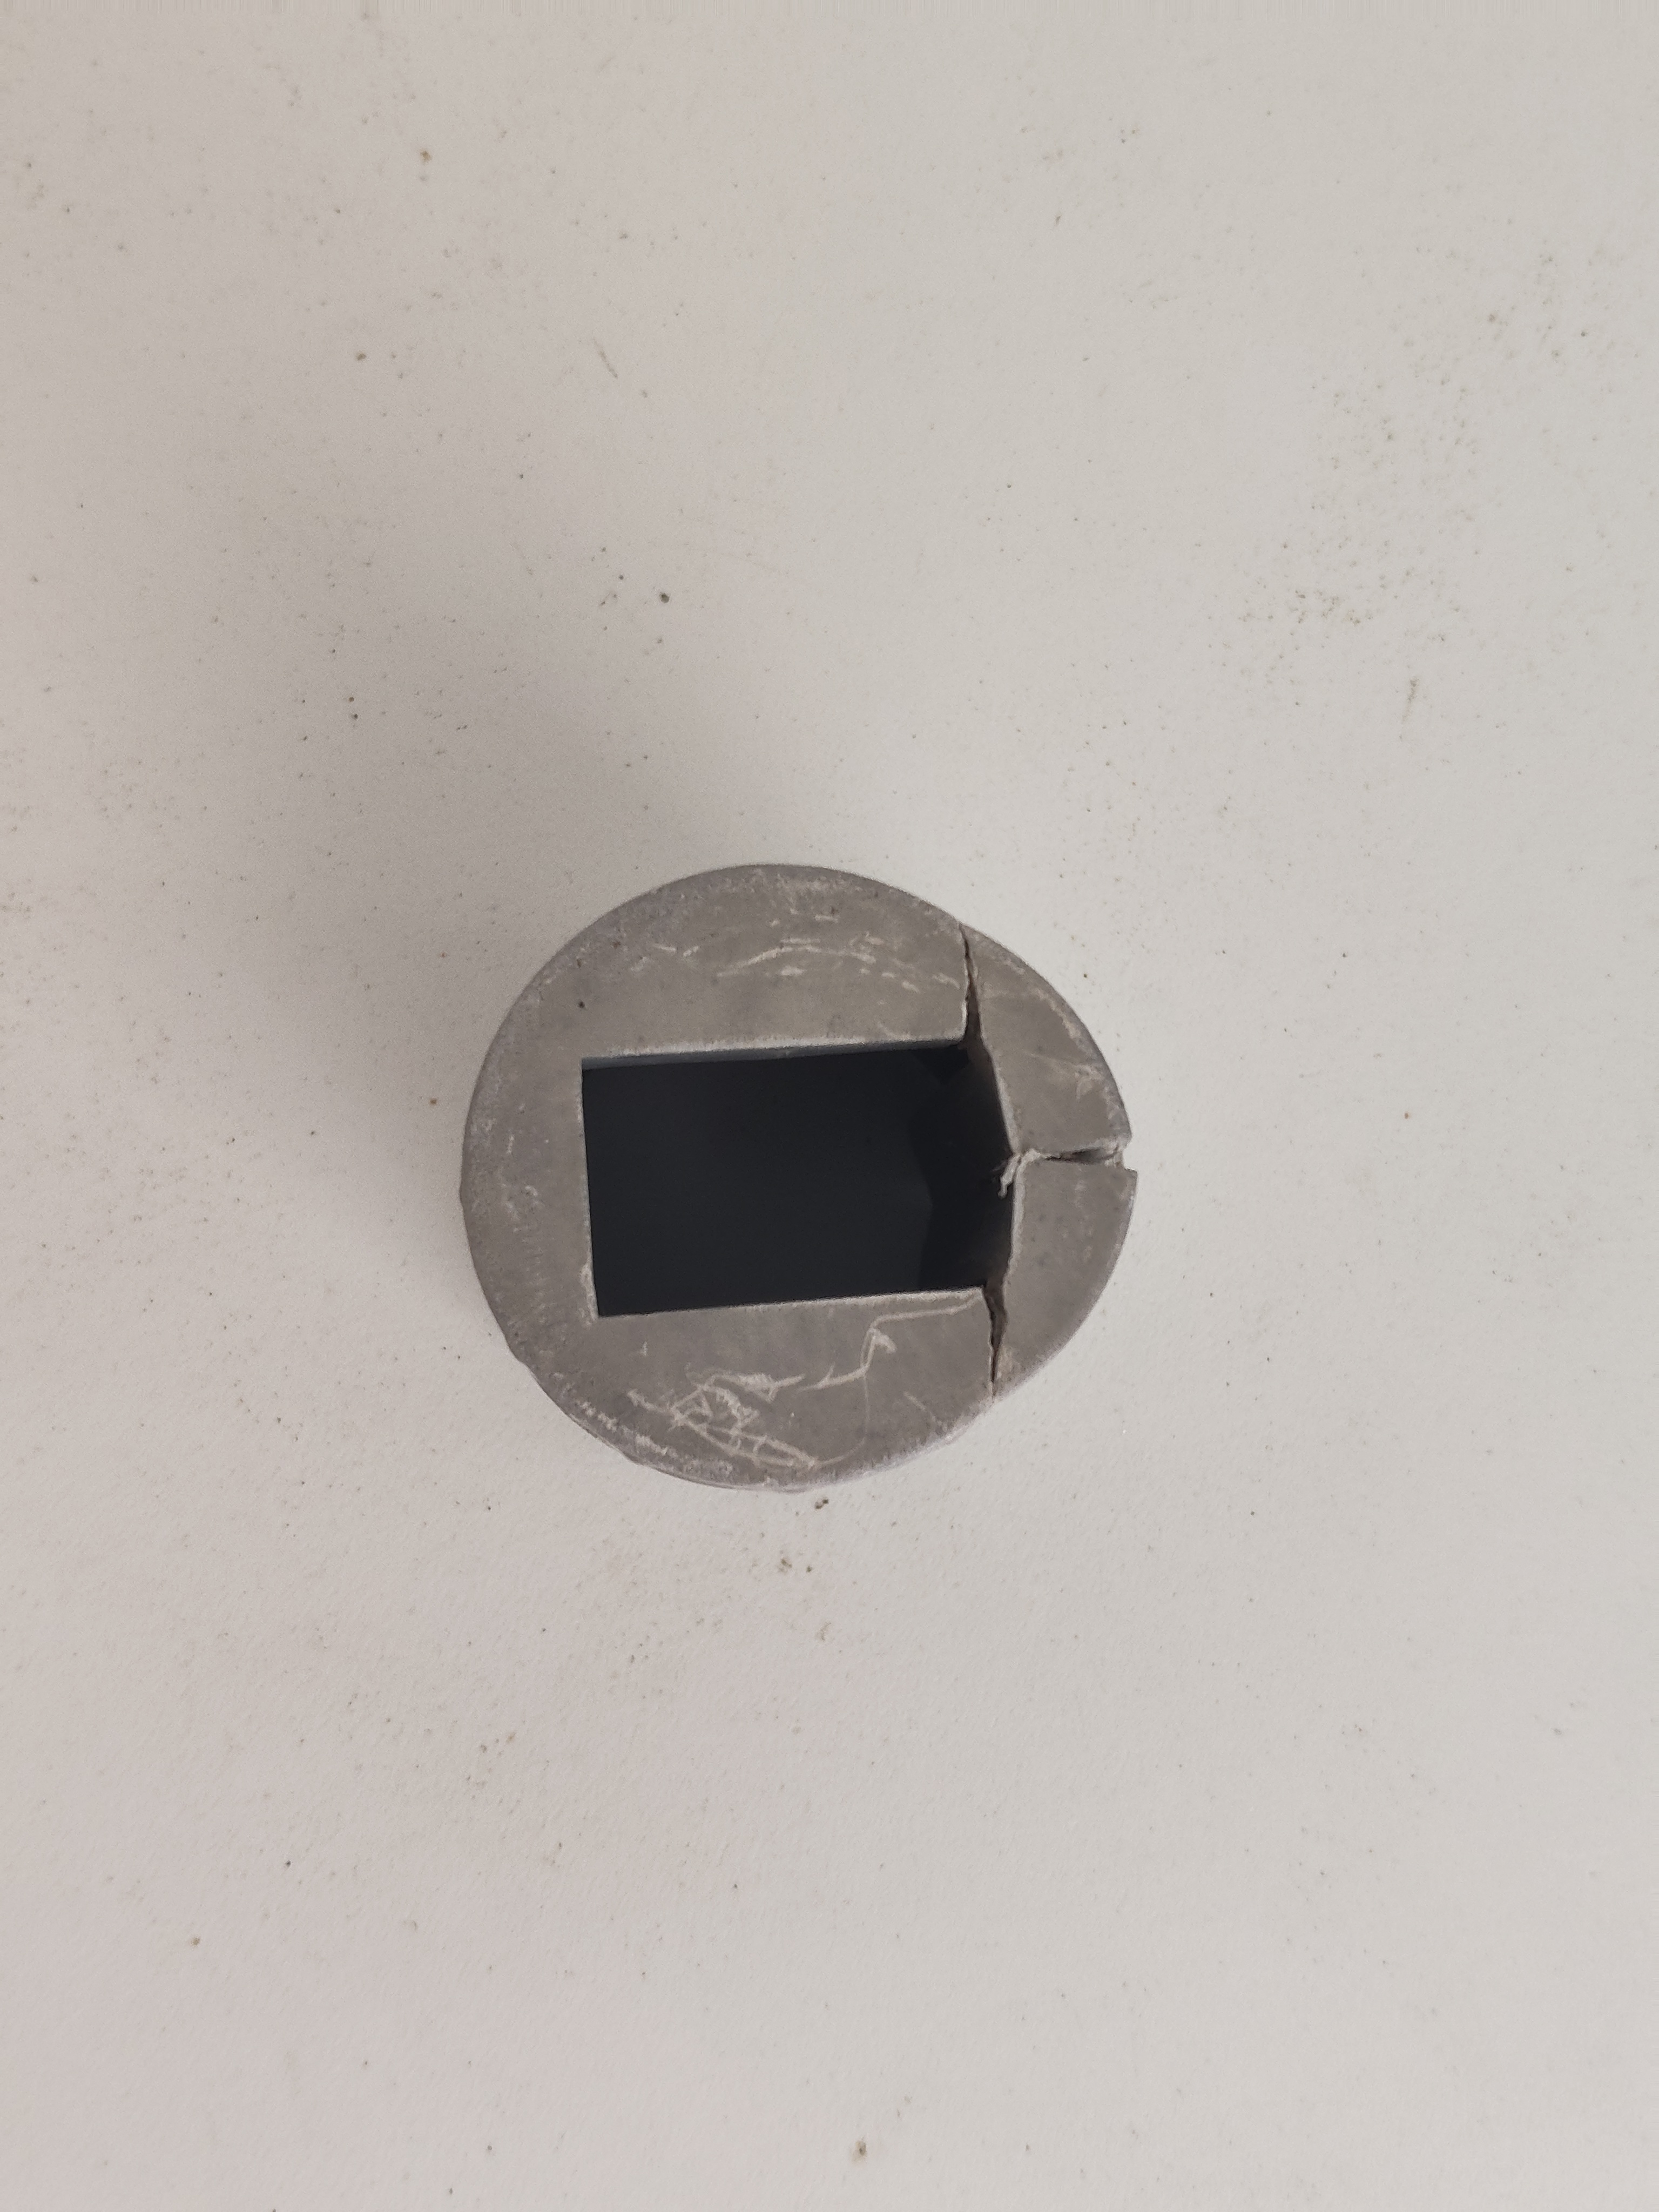
A cylinder 78 mm tall, 56 mm outer diameter, 46 mm inner. A solid base 13 mm thick with a centered rectangular window of 31.5 by 20.5 mm. Inside, a C-shaped rail 16.8 mm wide and 4.5 mm deep.
From that description, Claude generates a parametric Python script for FreeCAD, the open-source CAD software. It's a program that builds the part geometrically (cylinder, bore, window, rail), where every dimension becomes a variable you can change in a single line.
Validate before producing
Before writing a single line of code, Claude first proposed a technical drawing: a longitudinal section, a bottom view with the window, and a cross-section of the rail. This is the key step, the one that catches misunderstandings before any modeling.

That is exactly what happened: the rail was not a closed rectangular tube, but a C-shaped profile open toward the wall, the curve of the tube closing the channel naturally. One sentence of clarification, and both the drawing and the script were adjusted in seconds. We even added a 1 mm chamfer on the outer edges, simply by asking.
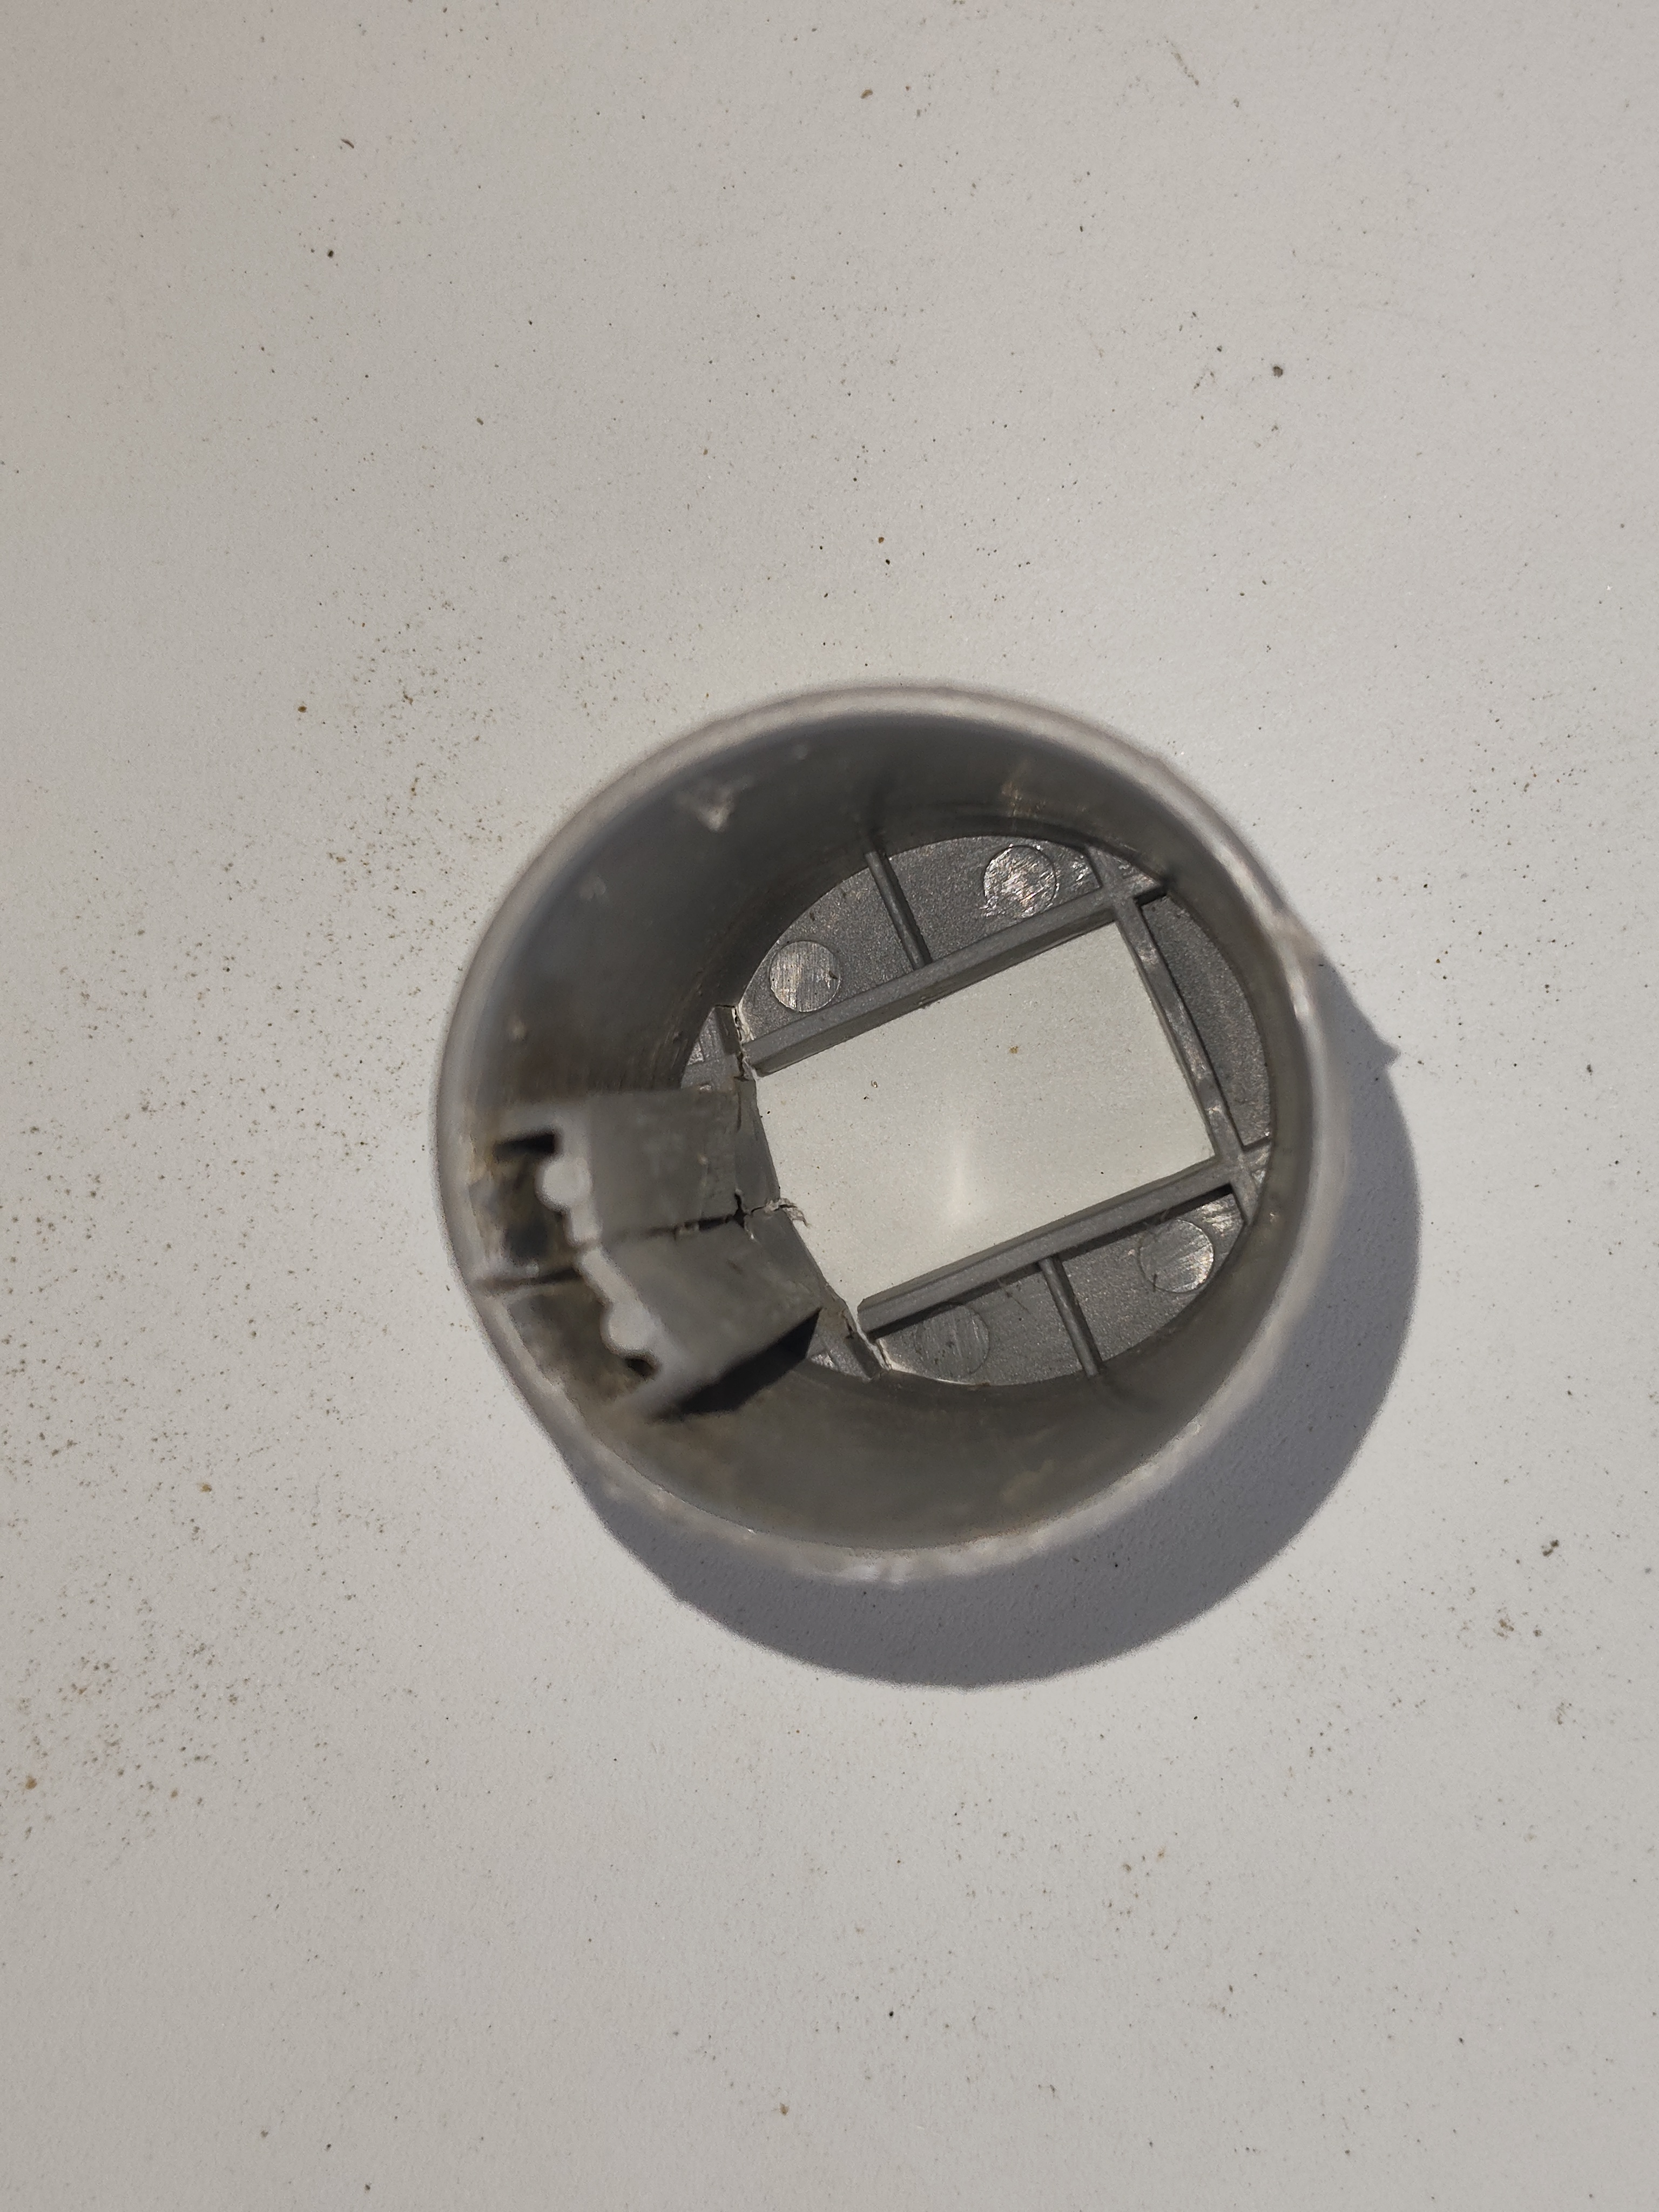
The 3D model
Once the drawing was validated, the script runs in FreeCAD and produces the solid. Here is the resulting model, seen from the open side (with the C-shaped rail) and the base side (with the rectangular window):
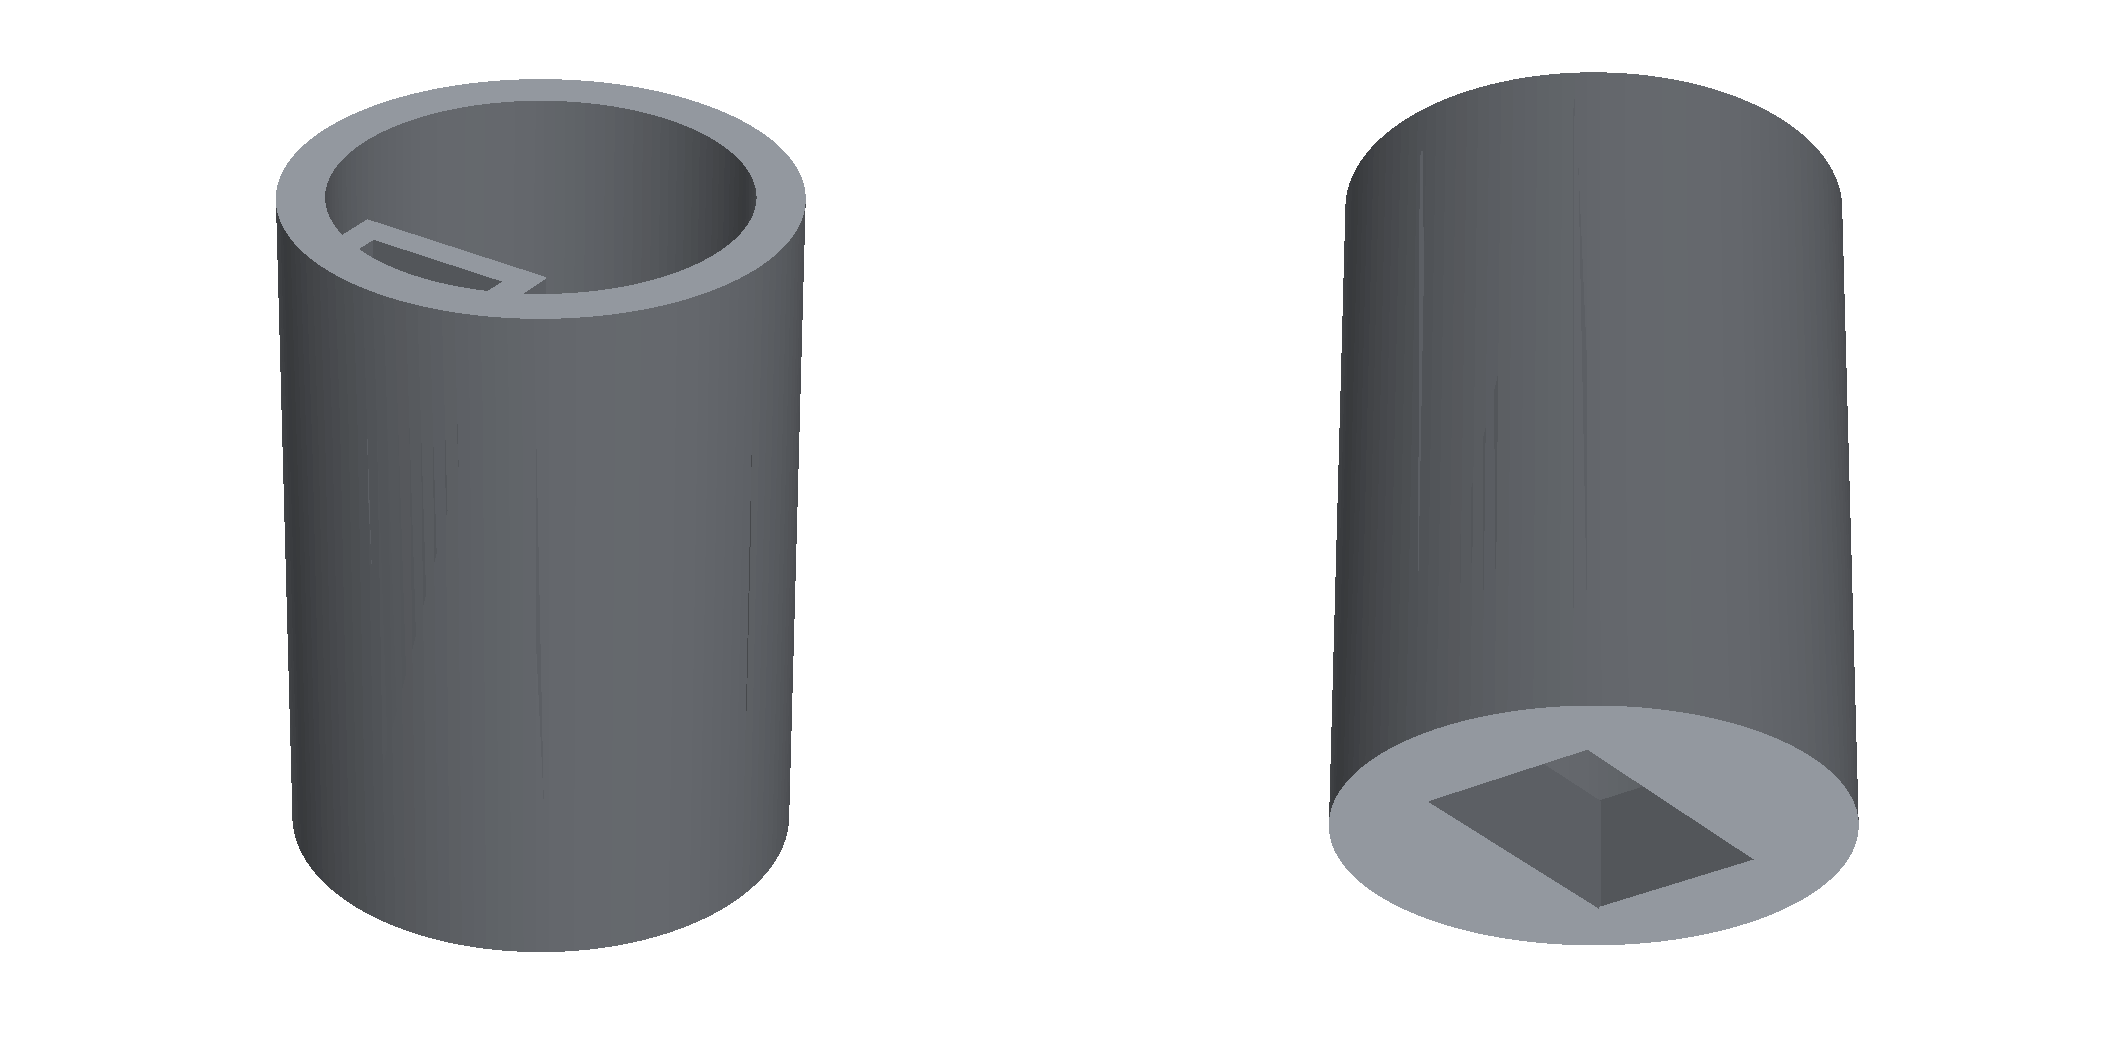
The file can be exported directly to STEP, for CAD, or to STL, for printing.
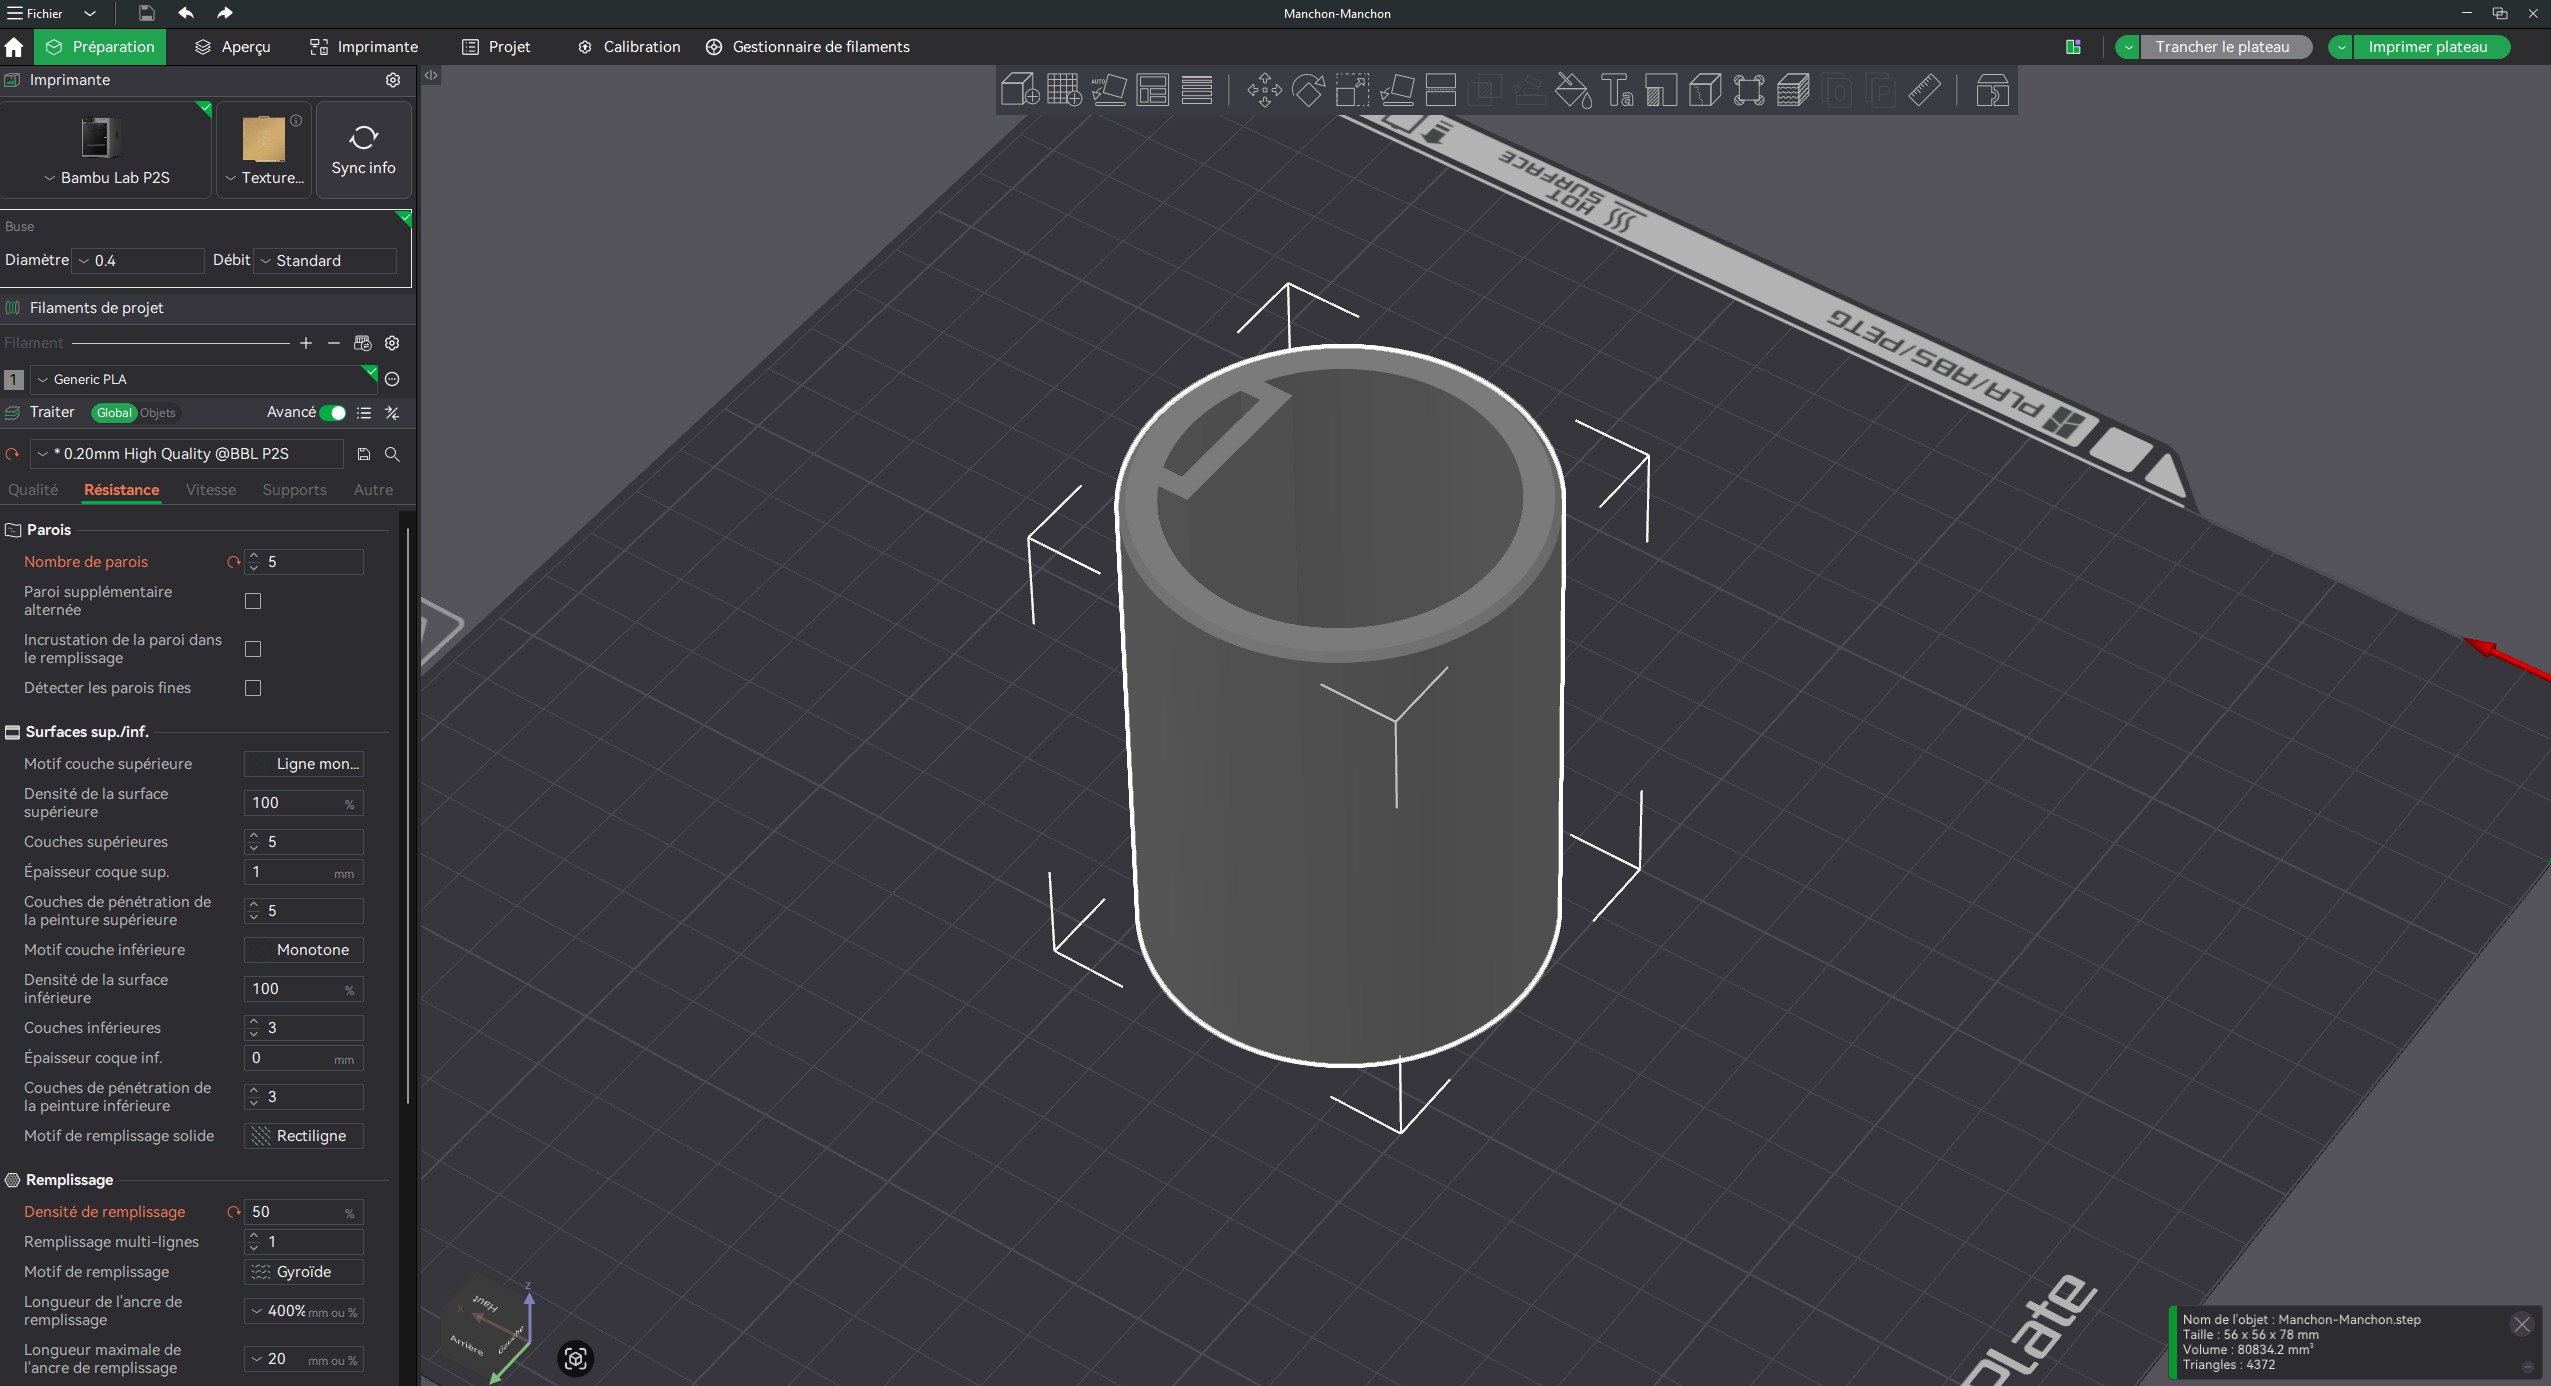
From screen to print bed
Final step: load the STL into the slicer (here Bambu Studio, on a Bambu Lab P2S printer) and hit print. The numbers speak for themselves.
| Parameter | Value |
|---|---|
| Material | 85.67 g of PLA (approx. 28.7 m of filament) |
| Print time | 3 h 29 (preparation included) |
| Material cost | approx. EUR 1.71 |
| Profile | 0.20 mm high quality, 5 walls, 50% gyroid infill |
An unfindable part, remade for less than two euros of material.
And here is the print in fast-forward, from the first layer to the finished part:
What it really changes
The most striking part isn't the technique, it's the time. Between the first photos and a print-ready model, only a short conversation went by. No multi-day CAD course, no sketch redone ten times: you describe, the AI proposes, you validate, you correct with a sentence.
And because the result is a parametric script, the part stays endlessly reusable. Change the diameter from 56 to 60, and you get a variant in a second. That is where the real value sits: not a frozen file, but a method that stays editable.
💡 Describing a part to AI and getting a printable parametric model reshapes our relationship to time: the rare skill is no longer drawing, but describing well and validating.
And for your business?
This is precisely what we teach at AB-Arts Academy: using tools like Claude to solve concrete problems in your field, whether CAD, writing, automation or analysis. Not theory, but real cases and measurable results you can apply the next day. Our Claude masterclass is built for exactly that.
→ To apply this method to your own parts and workflows, explore our Academy training or reach out via our contact page.
Move from reading to producing.
What we experiment with here, we ship for you. AB-Arts designs, trains and supports: three ways of working together, one team under the same roof.
Web, motion, video, image and campaigns. From concept to master, full production under one roof.
AB-Academy trains your teams in AI, workflows and creative tools. On-site or remote.
Audit, consulting, automation. We clear up your digital environment, and build what's missing.
Related articles
← All news
13 Blender Add-ons to Speed Up Your 3D Production
Our pick of 13 Blender add-ons that save serious time in production: modeling, UV, lighting, VFX, environments, with the download links.
Anthropic Suspends Claude Fable 5 and Mythos 5 Worldwide
On a US national-security order, Anthropic suspends Claude Fable 5 and Mythos 5 worldwide, citing a reported jailbreak. Here is what we know.
Anthropic Releases Claude Fable 5 and Mythos 5: Two New Models
Anthropic just shipped Claude Fable 5 and Claude Mythos 5, two models that beat GPT 5.5 and Gemini 3.1 Pro on agentic coding. A plain-language tour.